It may surprise some, but many small businesses new to inbound marketing are unaware that you can get some free advertising on Google through Google My Business (formerly known as Google Places) instead of paying for pay-per-click (PPC) ads on Google.
And because Google is always looking to increase the value of its local search results — as well as its Google Maps application — the search engine giant has a simple way for you to provide them with that valuable information about your business, which it infuses straight into its search engine results.

The benefit? Basically, a way to advertise your business on Google for free. And honestly, who doesn’t love some free advertising? This not only helps your business get found through searches; it can also help you get more traffic, leads, and customers.
(To learn how to advertise on Google for free and take advantage of Google’s other marketing tools, download our free guide here.)
Google My Business: Free Online Advertising
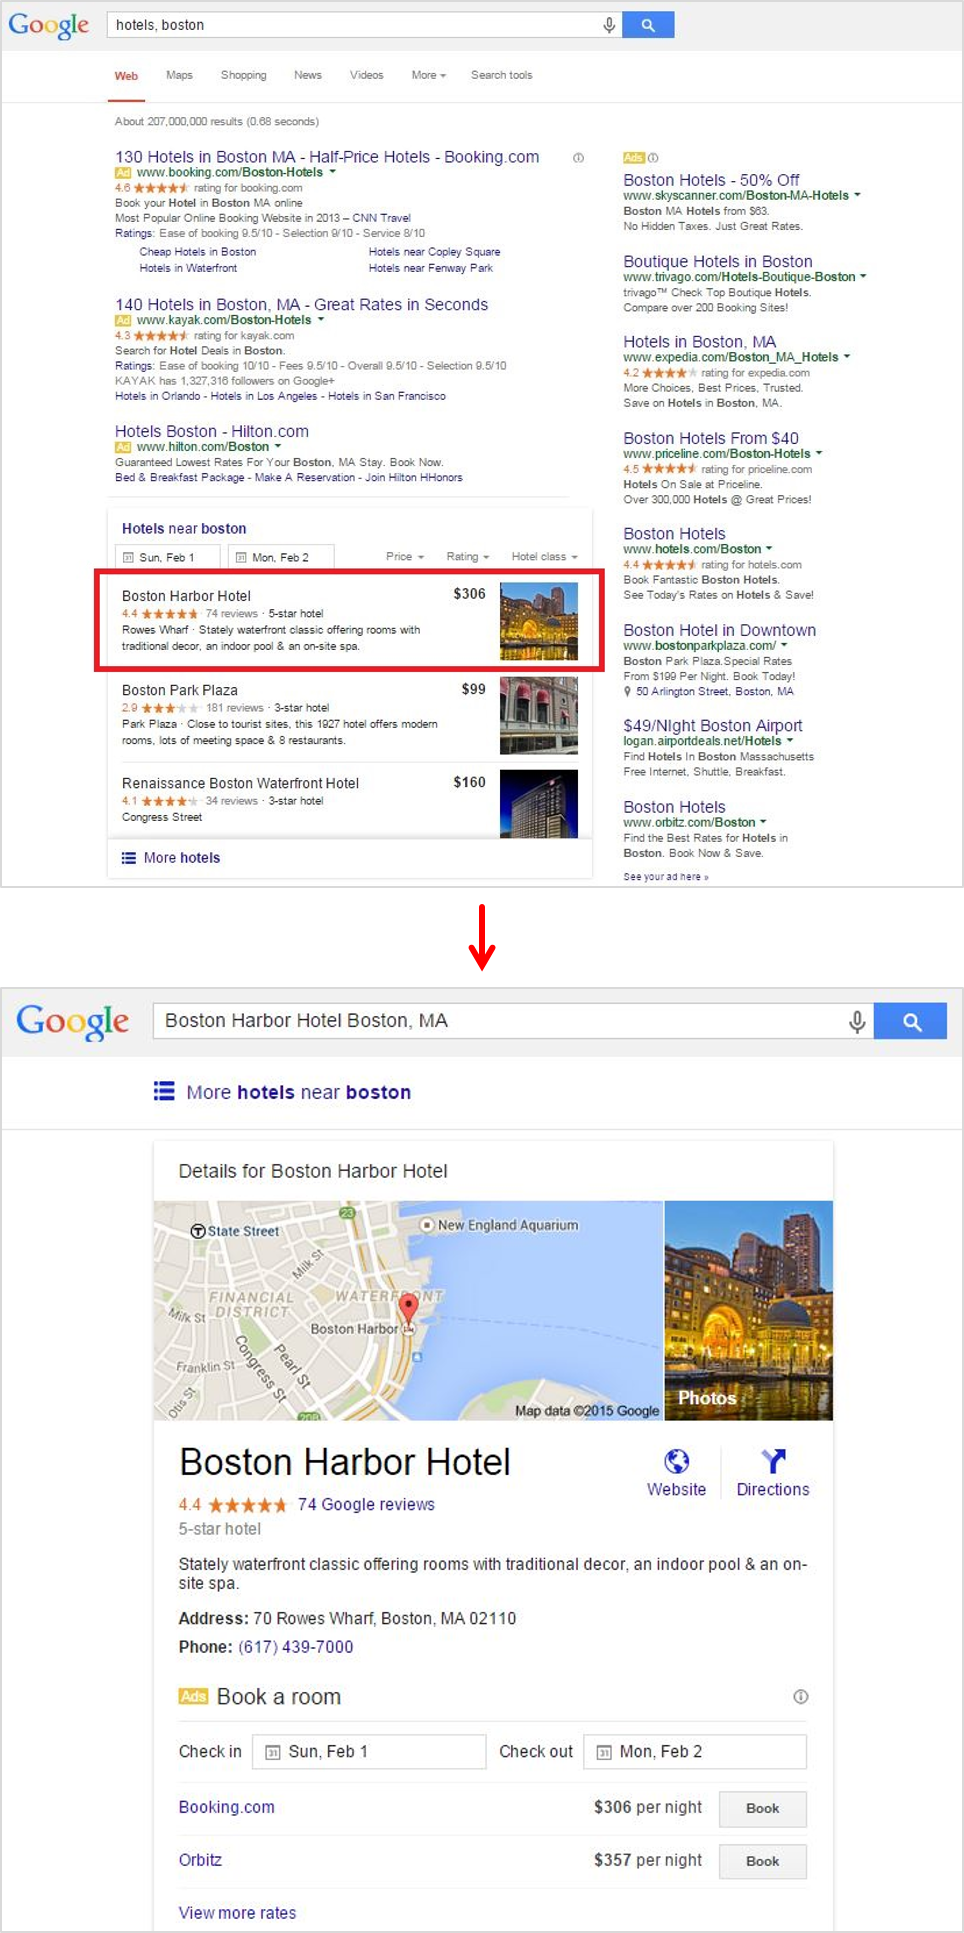
Consider this example: When you search for “hotels, boston,” the Boston Harbor Hotel ranks #1 in the Google My Business search results. Not too shabby a setup, is it? Especially considering it’s totally free!


So, are you ready to get some free online advertising in Google? Let’s get started.
How to Advertise on Google for Free
In order to set up your Google My Business free listing, you’ll need the following information at hand:
- A brief description of your business.
- Your phone number, address, website, hours of operation, and any other contact info you want to advertise.
- A logo or image that represents your business (for example, a picture of your office, store, or restaurant).
To set up a Google My Business listing, follow these simple steps …
Step 1: Set Up Your Account
Visit http://www.google.com/business. To set up your business on Google My Business, click the ‘Get on Google‘ button below the text, “Get your business on Google for free.”

Keep in mind that your Google My Business account will be connected to your Google account. First, search to see if your listing already exists. Keep in mind that you can edit a current listing at any time to display new information about your business — you just have to access the Google account used to create the listing, or request access from the owner. If you don’t yet have a listing, create one from scratch by clicking ‘Add your business.’
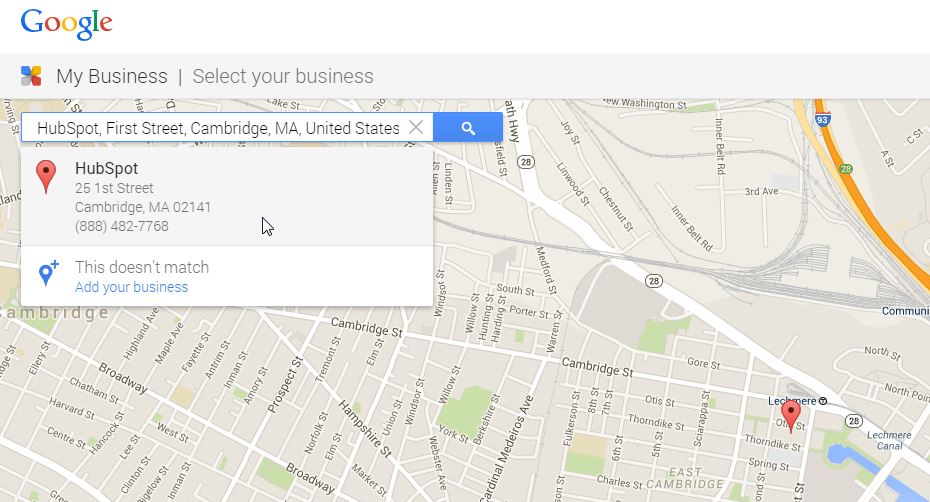
Step 2: Provide Your Business’ Location Information
Once you click ‘Add your business,’ Google will initially prompt you to provide the location information for your business as well as your business’ main phone number and category.
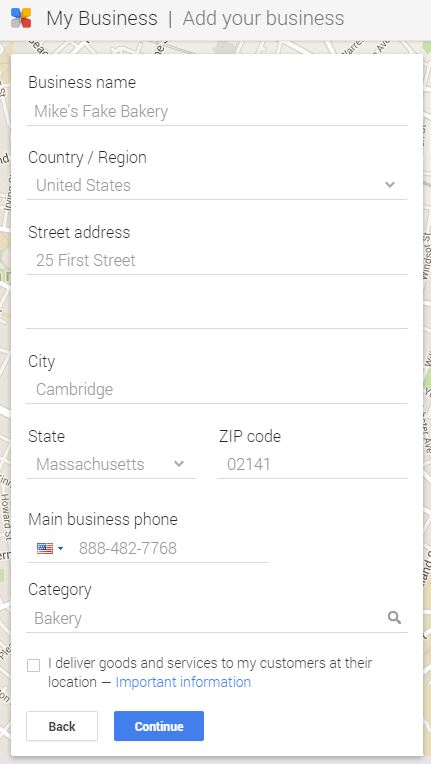
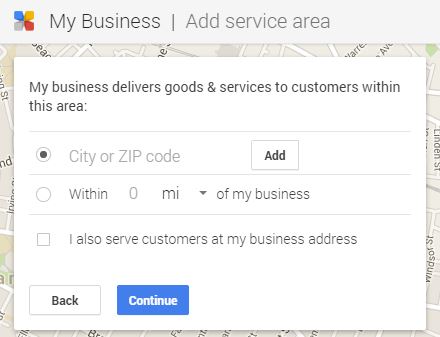
If you don’t have a brick-and-mortar storefront (for example, if you’re an online business that sells goods and services to customers at their locations), check the box at the bottom of the form to list your company as a service area business on Google. This will enable you to set up service areas based on either the zip codes or cities you serve, or within a given area around your location. Then, when people search for a business similar to your listing, your business will appear on a map within this specified range.
If your business serves only certain cities or areas within a city, you can choose the first option and pick only the areas you serve. This option can be helpful for companies that are only able to serve a certain area (such as a pizza delivery company) or operate in a very niche market (like a jet ski company on a beach).
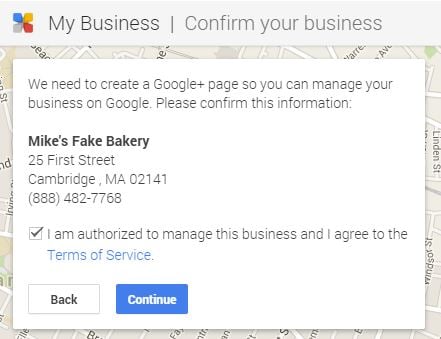
Step 3: Confirm Your Business & Agree to Terms of Service
Before you complete your business’ full listing (which Google allows you to manage as a Google+ page), you’ll need to confirm that the information you’ve entered up until this point is accurate, as well as agree to the Google My Business Terms of Service.
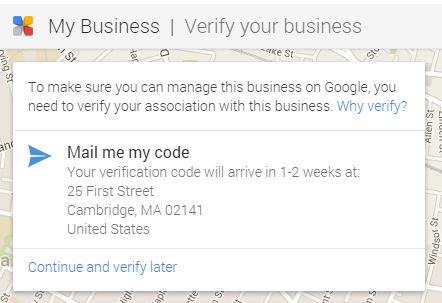
Step 4: Verify Your Business
Before Google can make your listing visible to the public, it needs to verify that your business is legitimate. This helps Google avoid fake listings and advertisements. Google will mail you a postcard in 1-2 weeks with verification information and next steps. As an alternative, you can verify your business via phone. (Here’s how.)
You can skip this verification step for now if you want, but ultimately, you’ll need to verify your business if you want your free Google advertisement to be live.
Step 5: Complete Your Business’ Listing Information
As I mentioned earlier, Google now uses the information from your business’ Google+ Page to power its Google My Business listings in search results, so the next step is to start editing your Google+ Page. Click the red ‘Edit‘ button at the top of your page to get started.
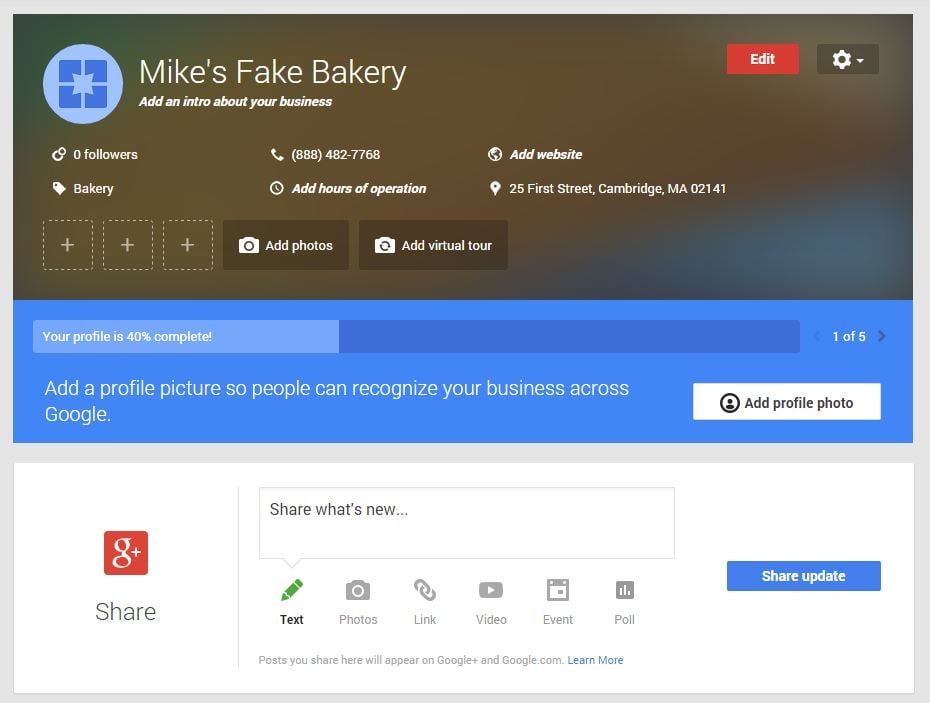
Then, start filling out your business’ details. Here is a full look at the type of information you can include:
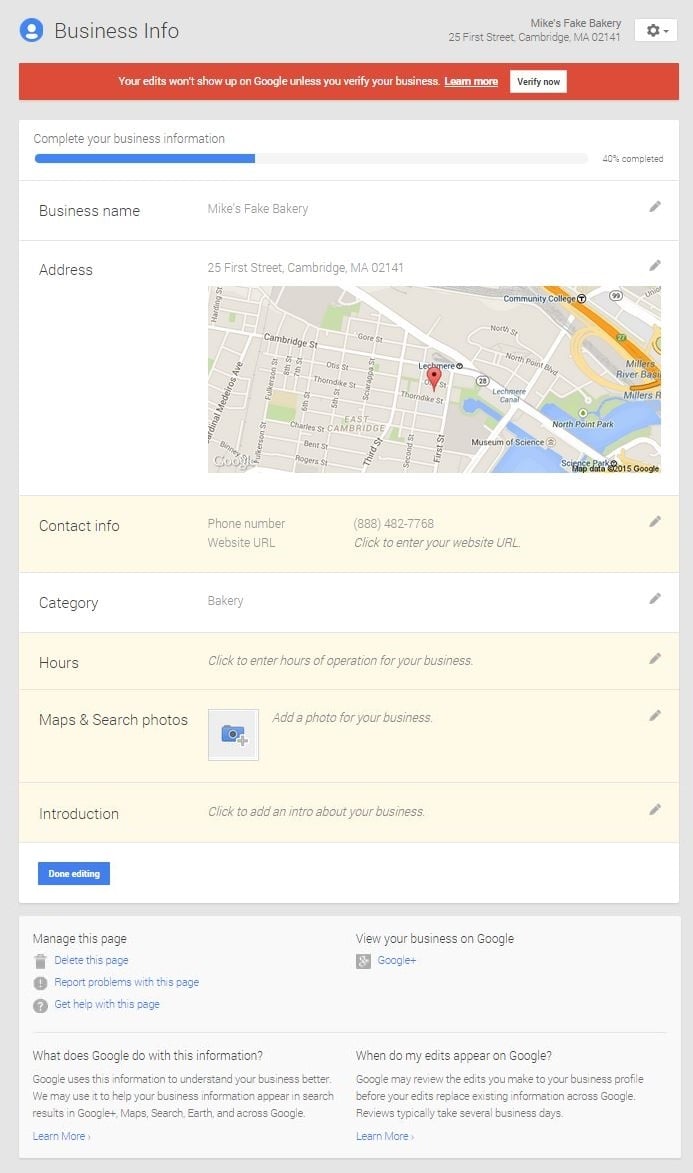
Some of these details will automatically populate from the information you previously provided in Step 2. You’ll also want to add your website, hours of operation, the profile photo for your business (for example, your logo or a picture of your storefront), and an “introduction.” Your introduction should be a brief description of your business. Think of it as a tagline. Be sure to add keywords you want to get found for in search, and try to keep your introduction short and sweet so it doesn’t get cut off in Google My Business search results.
Step 6: Optimize Your Business’ Google+ Page
While the information you provided above is all Google needs to include your business among its Google My Business listings in search results, it’s wise to take some extra time to optimize your business’ Google+ Page. To optimize your Google+ Page, click on the drop-down arrow at the top left next to ‘My Business‘ and select ‘Google+ Page.’

What to Optimize on Your Google+ Page:
- Cover Photo: Upload a high-quality, compelling image as your page’s cover photo. This image should be representative of your business as well as eye-catching and visually appealing. Download a pre-sized template to create your Google+ cover photo here.
- Your Story: Think of this as a mini ‘About Us’ page, and use it draw your visitors in with a clear and concise explanation of your business. Elaborate on your business’ description and the products/services you provide, and include any keywords you’re hoping to get found for in search.
- Links: Add any additional links you want visitors to check out. In addition to your business’ website, do you have a blog you want to point people to? An event you’re trying to drive registrations for? A particular landing page you’re promoting?
- Photos & Videos: To make your page more interesting to visitors, add photos and videos of your business, the products/services you offer, or anything else related to your company. If you own a restaurant or another business that lends itself to a virtual tour, you can hire a Google-certified photographer to create a virtual tour for your business that can be featured on your page as well.
- Status Updates, Events, and Polls: Keep your business page fresh by regularly sharing status updates, posting about events your business hosts, and engaging with your followers by publishing polls.
- Reviews: Respond to reviews left about your business.
- Settings: Manage your page’s settings via the left-hand drop-down navigation. Here, you can set up notifications, edit your page’s managers, etc.
To learn more about optimizing your Google+ Page and building a following for your business, download our free Google+ ebook here.
Google My Business allows marketers to provide existing and prospective customers with the information they need in the first place the majority of people look: Google Search. Good luck!
Editor’s Note: This post was originally published in June 2007 and has been completely updated for accuracy and comprehensiveness.

![]()

