You wouldn’t design a new kitchen without creating a blueprint first, would you? So, why would you design a website without creating a sitemap?
If you want to launch a website that Google (and your potential customers) can discover, you’ll need a sitemap. Here’s how to create one.

What is a sitemap?
A sitemap is a file of code that lives on your web server and lists all of the relevant URLs your website is carrying. Your sitemap helps search engine web crawlers understand how your website is built so they can evaluate and rank it more easily.
People create sitemaps when they first design their website, add pages to it, and/or redesign it. It’s kind of like a floor plan for the site, which comes in handy whenever the site gets changed. Along with boosting search engine optimization (SEO), sitemaps can also help define a site’s navigation scheme so you avoid internal linking issues.
Visual Sitemaps
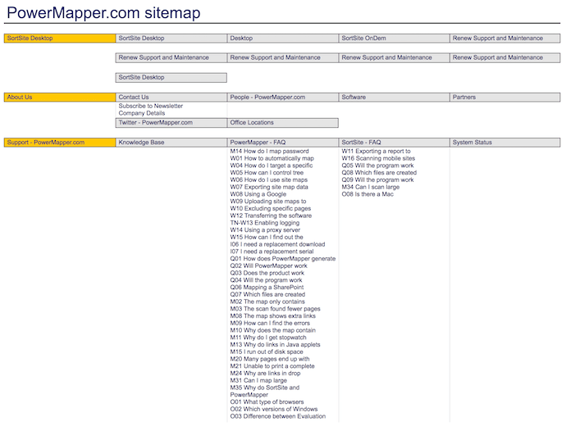
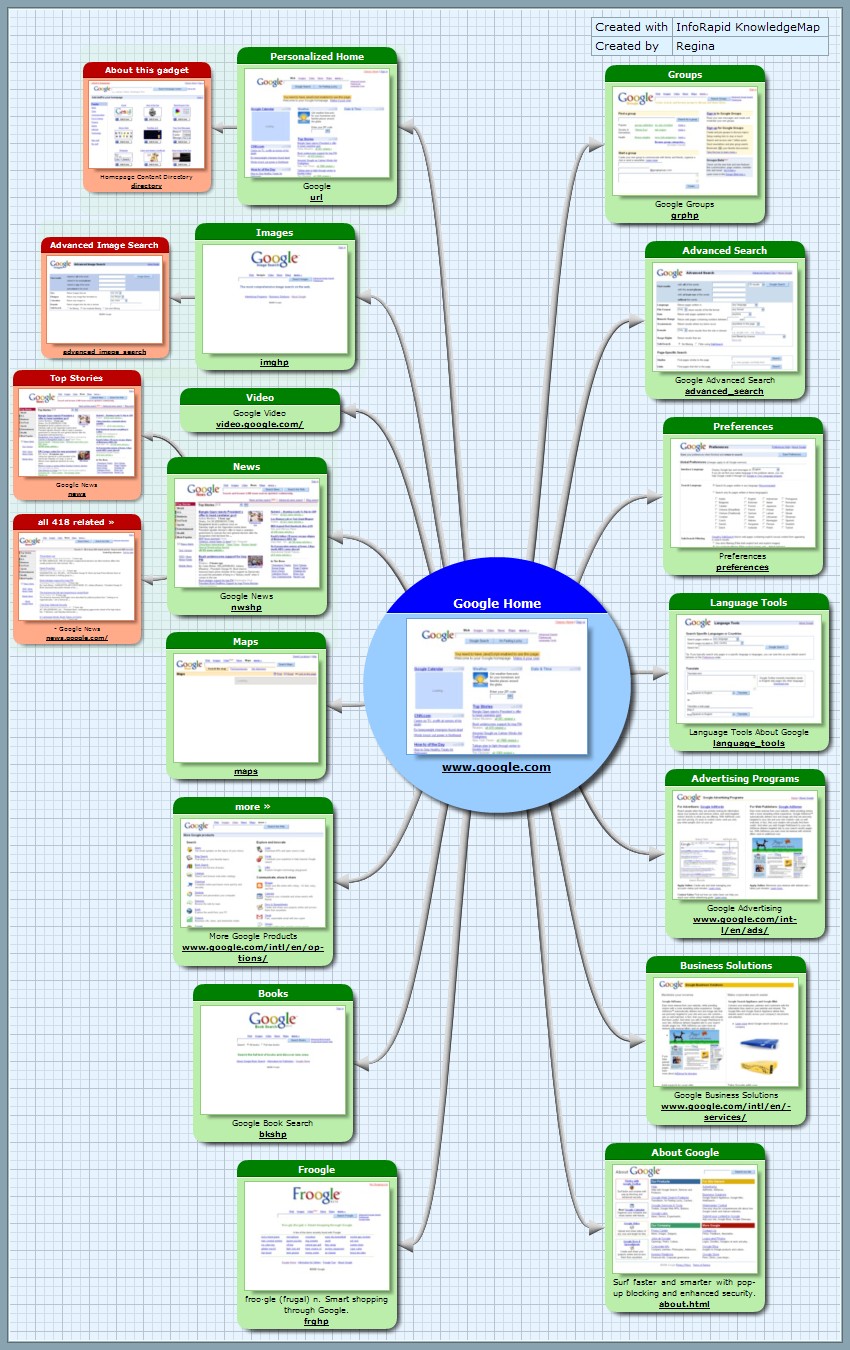
You might be thinking to yourself, “But I thought sitemaps were more visual, like a web.” That’s a visual sitemap, as opposed to an XML sitemap — the latter is what we’ve been talking about so far.
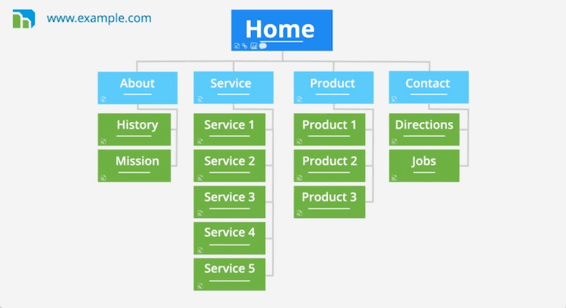
Visual sitemaps, on the other hand, are abstract sketches of your website’s structure, like the one below of Google’s website. They’re useful for the internal planning process, but it’s the XML sitemaps that are relevant to SEO best practices.

Image Credit: Wikimedia
XML Sitemaps
XML sitemaps are designed specifically for search engines like Google, which need to be able to find webpages anchored within a website no matter how old or deeply nested they might be in that website’s domain.
Here’s an example of what an XML sitemap file might look like:

Image Credit: Sitemaps.org
For this reason, an XML sitemap is a crucial component of a blog, where article pages are constantly bumped further back into the website’s archive as new content is published.
There are four major types of XML sitemaps you can create, each dedicated to a different type of media you might publish to your website:
- Image Sitemaps structure a website’s image content so that it ranks well in Google Images results.
- Video Sitemaps classify video content so that it ranks well in Google Videos results, as well as rich snippets in organic results.
- News Sitemaps describe your website’s news content so it’s more easily indexed in search results like Google News.
- Mobile Sitemaps optimize website content for mobile phones that don’t use native web browsers, which automatically produce web content in mobile form.
So, how do you structure your website’s XML sitemap? Let’s dive right in.
How to Create a Sitemap
1. Engage Your Marketing, Tech, IT, and Legal Teams
Typically, the teams involved in structuring a website’s sitemap are the marketing team, a technical team (whether that’s a team of developers or an agency), the IT team (or whoever controls your servers), and the legal team.
The Marketing Team
This marketing department is usually responsible for defining the structure of the site. Which pages need to link to one another? Should site visitors be able to get from the “About Us” page directly to the product page, for example? Whether they define the structure using a visual site map in PowerPoint or some other tool is up to them.
The Technical Team
A team of developers will then build an sitemap.xml file based on the structure defined by the marketing team.
The IT Team
Your support team usually gets involved too, assuming you’re using your own servers or some servers that IT controls. Remember, the sitemap lives on that server — so someone has to make sure it’s on there. If you’re working for an agency, they should be able to do this for you, too.
The Legal Team
Lastly, be sure you check with your legal team to make sure everything on your website is legally sound and you don’t have any outstanding copyright restrictions that could pass through your sitemap.
2. Research Each Search Engine’s Sitemap Requirements
When you first begin planning your sitemap, think about questions like: What are your website’s goals? Who’s your target audience, and what do they want to see?
You’ll also want to keep in mind each search engine’s requirements. The last thing you want to do is break the path of a visitor getting from a search engine to your website. Google’s, Bing’s, Yahoo!’s, and others’ requirements are fairly similar, but you’ll want to make sure you’re not breaking any specific requirements for any of them. This is especially true if you see a lot of your traffic is coming from a specific search engine.
To make sure you’re not breaking any rules, check out:
3. Define the Top-Level Navigation Structure
What do you want your homepage to link to? This will provide the foundation for your site’s structure, and will allow your site to grow.

The structure of your website plays a big role in your site’s SEO, so it’s important to plan your top-level navigation structure carefully. Specifically, pay attention to your website’s depth. The further away a page is from the original homepage URL of your site, the worse it is for that page’s SEO.
In other words, a shallow website (one that requires three or fewer clicks to reach each page) is much better for SEO than a deep website, according to Search Engine Journal.
What are best practices for top-level navigation, you might be asking? Unfortunately, it’s hard to give general advice here as best practices can vary significantly by industry, company type, and so on. For inspiration from companies similar to yours, then take a look at Crayon: It has a huge library of real marketing designs you can filter by industry, traffic level, device, and so on. Check out high-traffic homepages in your industry to get a sense of their structure and get some ideas for yours.
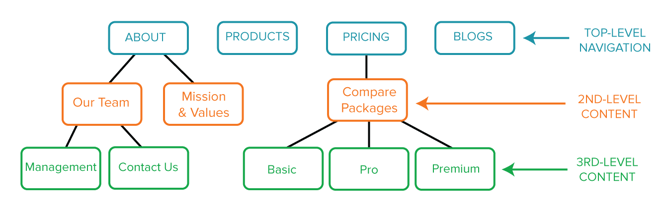
4. Define the Second- and Third-Level Content
This is where creating visual sitemaps can come in handy. Once you’ve defined your homepage’s navigation structure, you’ll want to brainstorm and map out the pages that are two or three levels deeper into your website. This might be your “About Us” page, your team management page, your hiring page, your blog, and so on.
Depending on the complexity of your website, you may only need two levels, or you may need up to four. And as you think out the deeper parts of your website, you may find you need to tweak the top-level navigation — that’s okay.
5. Write the XML Sitemap and Submit it to Search Engines
Once you’ve planned out how your website will be organized, it’s time for the technical team to create the XML sitemap, put it on your web server, and submit it to each individual search engine (Google, Bing, Yahoo!, and so on).
When you first publish your website, and each time you go through a significant site redesign, someone on your team will have to submit the sitemap to each search engine (Google, Bing, Yahoo!, etc.) so that those search engines will be able to tell your homepage from your “About Us” page from your team management page.
Unless you’re using a platform that automatically updates your sitemap, you’ll need to update the sitemap yourself and resubmit any time you make a significant changes to your website.
(HubSpot customers: HubSpot will automatically generate your sitemap.xml file when you publish new pages and make changes to your site. But remember, you’ll still either have to rely on search engines to pick up new pages organically. That means if you’ve made a really significant change to your site’s structure, you might want to manually submit it.)
Best XML Sitemap Generators
- Screaming Frog
- XML-Sitemaps
- Slickplan
- InSpyder
- Sitemap Writer Pro
- DYNO Mapper
- Rage Google Sitemap Automator
- WriteMaps
- PowerMapper
We recommend using a sitemap generator to build your XML sitemap. While the folks at Google no longer maintain their own sitemap generator, there are now plenty of free and downloadable tools you can use to create your own.
To make your choice of sitemap generator easier, here are nine of the best sitemap generators available today.
1. Screaming Frog
Price: Free
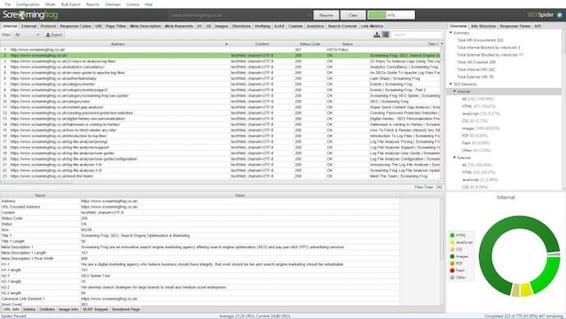
Screaming Frog is a web crawler that allows you to assess your website’s on-page SEO. Naturally, the company also offers a tool to develop your own XML sitemap and strengthen your website’s on-page SEO in the process.
To use Screaming Frog’s sitemap generator, you’ll first download the company’s SEO web crawler (also known as a “spider”), which is free for crawling your first 500 URLs. Once your website is crawled, you can create an XML sitemap from it including every webpage that scores a “200” in the initial crawl. This ensures only your strongest pages are included in your new XML sitemap.
2. XML-Sitemaps
Price: Free
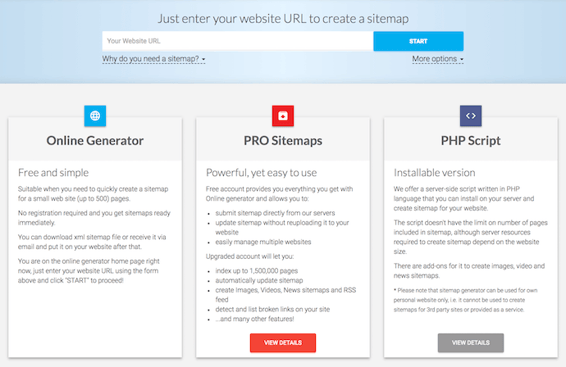
XML-Sitemaps requires no registration or initial download to create a sitemap for your website. Like Screaming Frog, which is explained above, this tool is free to websites that carry up to 500 URLs. Once your sitemap has been created, you can either download it as an XML file or receive it via email if you need to transport it to a new computer or coworker.
The paid version of XML-Sitemaps allows you to crawl up to 1.5 million pages (instead of 500), create other forms of XML sitemaps — such as news, video, and image sitemaps — and submit your sitemap directly to a search engine from the sitemap generator.
3. Slickplan
Price: Free trial, plans start at $8.99/mo
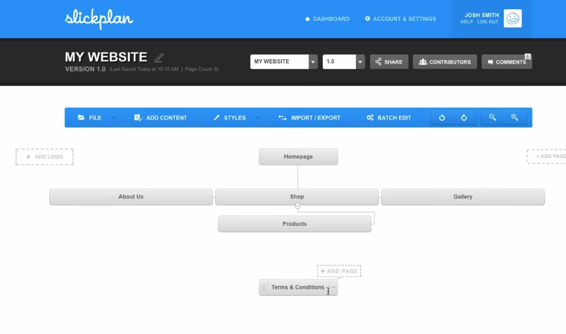
Slickplan offers a suite of content planning products that are ideal for freelancers, agencies, and small businesses. One of these products is an XML sitemap builder. This tool helps you build a visual sitemap first so you can determine how your website will be organized, then export your visual sitemap as an XML file.
4. InSpyder
Price: Free trial, $39.95 for full version

InSpyder is a fully downloadable sitemap builder that allows you to crawl an unlimited amount of URLs and synthesize them all in an XML sitemap for you.
The tool, which is free to try, is compatible with Google, Bing, Yahoo!, and Ask.com, so you can quickly submit your XML sitemap in the format the biggest search engines expect to see it. You can also schedule sitemap updates at regular intervals if you know you’ll make frequent changes to your website. A blog that regularly publishes new articles (with new URLs) is one example of a website that would benefit from a new sitemap every so often.
5. Sitemap Writer Pro
Price: $24.95
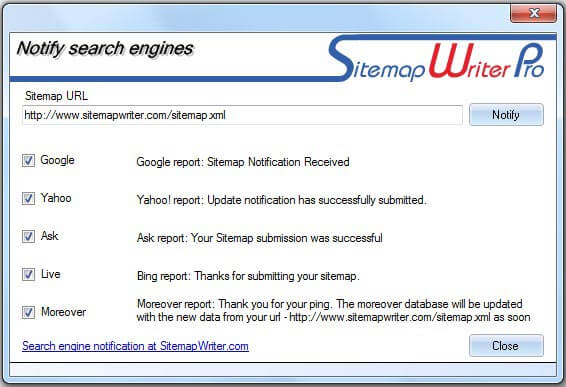
Sitemap Writer Pro is a fast and simple XML sitemap creator, compatible with seven types of sitemaps depending on the type of content you want search engines to index. The tool can crawl millions of webpages and automatically produce a sitemap file that is ready to be imported into your content management system (CMS).
Sitemap Writer Pro is free to try for crawling up to 10 webpages, and requires a Windows operating system to run.
6. DYNO Mapper
Price: Free trial, $40/mo billed yearly
DYNO Mapper is similar to Slickplan in that it is a visual sitemap builder. Start by outlining your website and its URLs in one of four visual formats, then edit the placement and hierarchy of each webpage included in your sitemap and export your sitemap file so you can easily share it with your colleagues.
DYNO Mapper comes with Google Analytics built in, so you can accurately identify your highest-performing webpages and where they should be placed on your sitemap. This integration also comes in handy when updating your sitemap, in which case you can simply import your sitemap’s XML file and revisit its visual model for quick adjustments.
7. Rage Google Sitemap Automator
Price: Free trial, $29.95 for full version
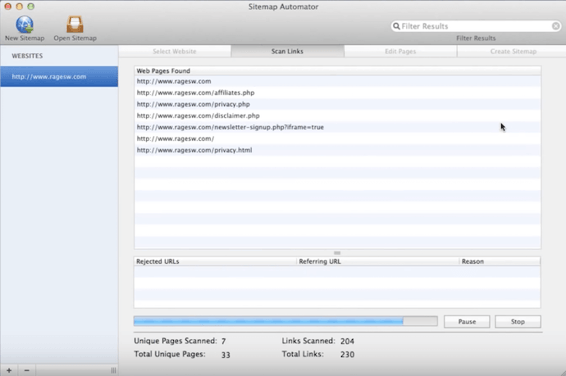
Rage Google Sitemap Automator is both an SEO auditor and XML sitemap builder. The tool allows you to quickly optimize your website’s on-page SEO so it’s easily crawled by Google, then create a sitemap that’s downloadable to an XML file in a matter of minutes.
This sitemap generator also lets you create your own “filters” for assigning various attributes to the webpages included in your sitemap — making it particularly useful for big websites that have many URLs serving diverse purposes.
8. WriteMaps
Price: Free for 3 small sitemaps
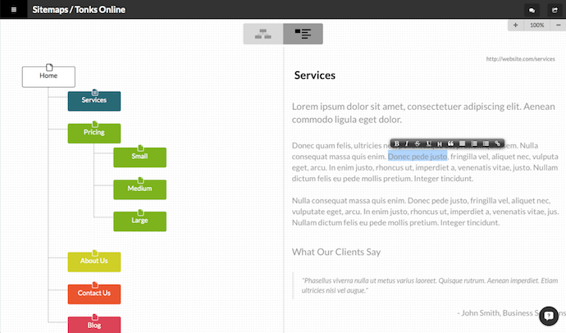
WriteMaps is a visual website planner, helping you create a color-coded flowchart that outlines the content of every URL nested within your website. Once your website — and its webpages — are written and sorted exactly the way you want them, you can export your sitemap as a PDF or as an XML file for submitting to search engines.
WriteMaps’ interface is perfect for team-wide collaboration, making this tool especially useful for companies that are in the process of building a website from scratch.
9. PowerMapper
Price: Free Trial, $149 for standard version
PowerMapper is touted as a “one-click” sitemap maker, used by several major organizations to create sitemaps for their websites in a number of potential mapping styles. The tool uses its own web browser, where you can navigate to your website and click “Map” to create a sitemap from every webpage currently live on that website.
For more options of XML sitemap generators, check out this archive of suggestions by Google. Not all of the links on Google’s list are still active services, but you’ll still find tools that are designed with Google’s website ranking algorithm in mind.
Once you’ve selected a sitemap generator, and created your sitemap in XML form, you’ll need to add it to your website’s source code and submit this sitemap to each search engine on which you want your website to be indexed.
Below are step-by-step instructions for submitting a sitemap to Google, and then to Bing and Yahoo!.
How to Submit Your Sitemap to Google
- Sign in to Google Webmaster Tools.
- Click “Add a Property.”
- Enter the URL for your company and click “Continue.”
- Click “Crawl” on the lefthand sidebar and choose “Sitemaps.”
- Click “Add/Test Sitemap.”
- Enter “sitemap.xml” after your website’s domain name.
- Click “Submit Sitemap.”
1. Sign in to Google Webmaster Tools.
Google Webmaster Tools will be your dashboard for testing and submitting updated sitemaps to Google, so you can ensure Google is always aware of the latest pages published to your site.
For this step, you’ll first need to register your website with Google. Click the link at the beginning of this paragraph to get started.
2. Click “Add a Property.”
Once you’ve logged in to Google Webmaster Tools, click “Add a Property,” the square red button on the top righthand corner of your screen.
3. Enter the URL for your company and click “Continue.”
Type in the website whose sitemap you want to submit, exactly as it appears in your address bar. This website should just be the domain name — the parent URL to which all of your other webpages belong.
4. Click “Crawl” on the left-hand side of the page, and choose “Sitemaps.”
Once you add your website property, you’ll see a sidebar of options to the left. Click “Crawl” to reveal a dropdown of options and select “Sitemaps.”
5. Click “Add/Test Sitemap.”
To the right of your screen, you’ll see another red button for adding a new sitemap. Click it. If you already have a sitemap submitted, this button will simply say “Test,” allowing you to verify that Google has crawled your current sitemap.
6. Enter “sitemap.xml” after your website’s domain name.
Adding a new sitemap requires you to add a string of text to the end of your website’s domain. Think of it like a tracking tag, allowing Google to examine all the activity that takes place inside your website.
This sitemap tag is “sitemap.xml,” and you’ll want to add it to the end of your domain name. For example, if your domain is www.yourcompany.com, you’ll tag it like this: www.yourcompany.com/sitemap.xml
7. Click “Submit Sitemap.”
Submit your sitemap and you’re all set. Depending on how much page authority you have already accumulated on Google, it might take some time to see the status of your submitted sitemap. Give it time — Google will eventually accept it.
For more information on the sitemap submission process, click here.
How to Submit a Sitemap to Bing or Yahoo!
- Sign in to Bing Webmaster Tools.
- On the My Sites page, enter the URL for your company (e.g. http://www.yourdomain.com). Click “Add.”
- In the “Add a sitemap” field, enter http://www.yourdomain.com/sitemap.xml. (Replace “yourdomain” with your company’s URL.)
- Complete the rest of the required fields on the page, and click “Save.”
(For more details, click here.)
What If I Want to Add Webpages Later?
Once you define and submit your sitemap the first time, chances are you’ll want to tweak and add pages to your website every so often — and that’s completely fine. But keep in mind that if your website isn’t built on a platform that automatically generates a new sitemap and updates it on your web server when new pages are added, then every time you add a page — any page — to your website, that page will be missing from the sitemap that search engines see.
Remember, Google and other search engines will pick up the sitemap organically as long as you’ve updated the sitemap.xml file on your web server. But if you want to try to index your content the fastest way possible, you could resubmit your sitemap after publishing a new page — and it’s possible that Google would pick it up more quickly.
Once you’ve created and submitted your XML sitemap to search engines, you can start working on other fun stuff like your website’s design.
Having an up-to-date sitemap is just one marker of a high-performing website. To see what else you should optimize for your site, run a free Website Grader report.


![]()


